Kia Picanto (JA): Hood / Hood Latch
Components and components location
| Component Location |
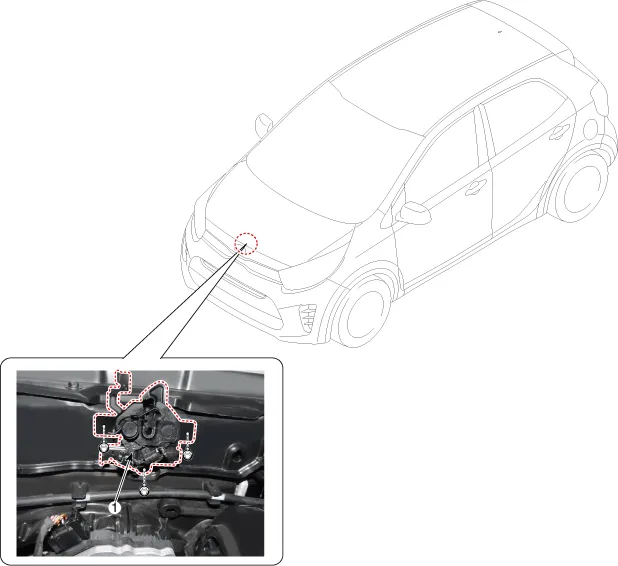
| 1. Hood lower latch assembly |
Repair procedures
| Replacement |
| 1. | Disconnect the hood latch connector (A).
|

| 2. | Remove the hood lower latch assembly (A) after loosening the bolts.
|

| 3. | Install in the reverse order of removal.
|

Components and components location Component Location 1. Hood latch release handle Repair procedures Replacement 1. Using a remover, remove the hood release handle (A).
Components and components location Components 1. Front pillar trim assembly 2. Front door scuff trim assembly 3. Center pillar upper trim assembly 4.
Other information:
Kia Picanto (JA) 2017-2026 Service & Repair Manual: Smart Key System
Specifications Specifications Smart Key Unit Items Specification Rated voltage DC 12 V Operating voltage DC 9 - 16 V Operating temperature -31 - 167°F (-35 - 75°C) Load Max. 4mA (When welcome light function "OFF") RF Receiver Items
Kia Picanto (JA) 2017-2026 Service & Repair Manual: Temperature Control Actuator
Components and components location Component Location 1. Temerature Control Actuator Description and operation Description 1. Heater unit includes mode control actuator and temperature control actuator. 2. Temperature control actuator is located at the heater unit.
Categories
- Manuals Home
- Kia Picanto Owners Manual
- Kia Picanto Service Manual
- Fuel Delivery System
- Engine Oil and Filter
- Battery
- New on site
- Most important about car
